


Fine motor skills involve the small muscle movements of the hands and fingers – the precise actions we use for tasks like holding a crayon, cutting with scissors, buttoning a shirt, or zipping a coat. These motor skills are essential in early childhood development because they lay the foundation for school readiness, independence in self-care, and overall confidence.
When toddlers and preschoolers develop strong fine motor control, they’re better prepared for tasks like handwriting, feeding themselves with utensils, and completing puzzles or crafts. However, if these skills are underdeveloped, children may struggle with things like pencil grip, dressing, or even using classroom tools – leading to frustration in everyday routines.
That’s where play comes in. Engaging toddlers in fine motor activities helps them build essential skills through fun, hands-on play—without any pressure. Research shows that engaging in motor skills activities like bead threading, cutting paper, or drawing not only improves dexterity but is also linked to better academic skills, including reading readiness.
This blog offers 20 fine motor skills activities for 3–4 year olds that are safe, engaging, and developmentally appropriate. Whether you're a parent, preschool teacher, or therapist, these hands-on games and tasks—using everyday items or classroom tools—will help your little ones build hand strength, coordination, and confidence through play.
20 Fine Motor Activities for Preschoolers and Toddlers:
1. Playdough Pinch and Roll
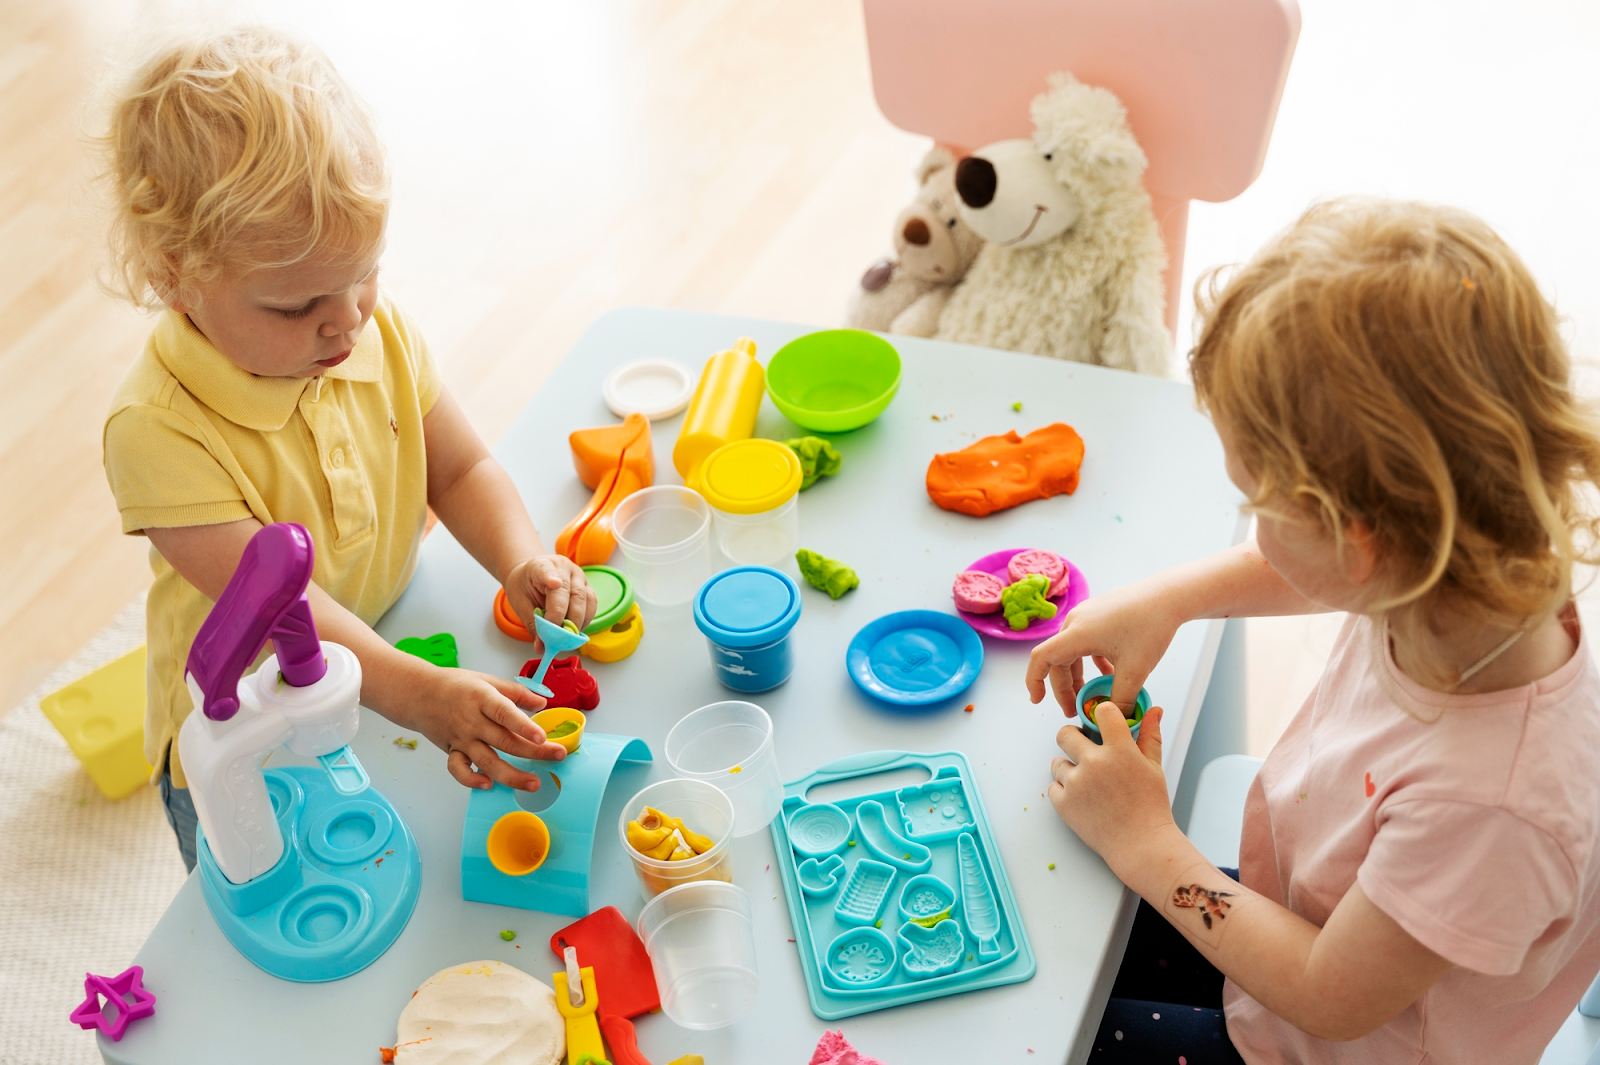
Materials: Playdough or child-safe modeling clay.
How to Play: Encourage your child to roll the playdough into snakes and balls, pinch off pieces, flatten them, or use cookie cutters to make shapes. They can also squish and squeeze the dough or even use plastic scissors and utensils to cut and mold it. Let them get creative in building simple sculptures or pretend foods.
Skills Developed: Molding playdough by rolling, squeezing, and pinching strengthens hand muscles and improves finger control. Pinching off bits of dough is great for the pincer grasp (thumb and index finger together), and two-handed play (one hand holding the dough while the other molds) encourages bilateral coordination. This fun sensory activity also boosts focus and pre-writing skills by exercising the same small muscles needed for holding pencils.
2. Scissor Cutting and Gluing Collage
Materials: Child-safe blunt scissors, old magazines or colored paper, glue stick, construction paper.
How to Play: Set up a “cutting station” where your preschooler can practice snipping paper. Draw simple lines or shapes on paper for them to cut out, or let them freely snip strips of paper. Then help them use a glue stick to paste the cut pieces onto a larger sheet to create a collage or mosaic. They could make a random collage or form a simple picture from the shapes they cut.
Skills Developed: Cutting with scissors and then gluing pieces in place is fantastic for hand-eye coordination and precision. Using scissors requires a proper grasp and strengthens the tripod fingers (thumb, index, middle) while the other hand works to turn/hold the paper, building bilateral coordination. Pasting the pieces demands precise finger movements and teaches control. This craft-based activity strengthens the same skills needed for writing and using tools, and it also lets kids express creativity.
3. Bead Threading (Pasta Necklace)
Materials: Large beads or pasta with holes (like tube pasta or cereal like O-shaped Cheerios), a length of string or yarn (tape one end to make a firm tip).
How to Play: Show your child how to string the beads or pasta onto the yarn to create a necklace or bracelet. You can start the stringing and tie one bead at the end as a stopper. Then let them thread pieces one by one. They can sort colors or create a pattern, or just freely thread and then wear their creation proudly. (For younger preschoolers, ensure the beads or pasta are large enough to avoid choking hazards, and supervise closely.)
Skills Developed: Stringing beads or pasta requires focus and careful hand movements, which is excellent for improving fine motor coordination. This activity specifically targets the pincer grasp (picking up small pieces with thumb and finger) and hand-eye coordination as kids aim the bead onto the string. It also involves bilateral coordination – one hand holds and stabilizes the string while the other hand threads the bead. As a bonus, beading can improve concentration and patience, and even early math skills if you talk about patterns or counting beads.
4. Lacing Cards or Shapes
Materials: Lacing cards (sturdy cards with holes around the edges) and a shoelace or yarn. You can DIY this by punching holes along the edge of a cardboard shape (like a foam shape or an index card) and using a tape-wrapped yarn as the lace.
How to Play: Invite your child to “sew” by threading the lace in and out of the holes around the card. Show them how to pull the lace through one hole and then find the next. They can lace all around the shape or card. There’s no wrong way – some kids may go in random order, others in sequence around the edge.
Skills Developed: Lacing activities build fine motor control and bilateral skills. The dominant hand threads the lace while the other hand helps by holding the card steady – a great exercise in using both hands together. Manipulating the lace through small holes strengthens finger dexterity and the pincer grasp (especially if the lace has a taped “aglet” end to pinch). Kids also practice visual tracking and planning as they decide which hole to go to next. This activity reinforces hand-eye coordination and concentration, and mimics the motions of sewing, which can make kids feel very accomplished.
- Tweezers and Tongs Transfer (Pom-Pom Pick Up)
Materials: Child-sized tweezers or kitchen tongs, two bowls or containers, and small items to pick up (pom-poms, cotton balls, large beads, etc.).
How to Play: Place the small items in one bowl and leave the other bowl empty. Have your child use the tweezers or tongs to pick up the items one by one and transfer them to the empty bowl. To make it playful, they can pretend they are feeding a “hungry monster” by dropping pom-poms into a monster-decorated cup, or simply see how fast they can move all items. You can also incorporate a little game: roll a die and have them transfer that many pom-poms, or use tongs to sort colors into different cups.
Skills Developed: Using tweezers or tongs to grasp objects is a simple but very effective way to build fine motor strength and control. The squeezing action reinforces the same muscles needed for a pinching grip and helps develop hand strength. It directly works on the pincer grasp if the tweezers are small, and overall finger coordination. Transferring objects also demands hand-eye coordination to aim and drop the items accurately. If you encourage your child to use one hand with the tool and reach across their body to the opposite side bowl, it can even promote crossing the midline (which is great for brain coordination). This activity feels like a game, but it’s building foundational skills for writing and utensil use.
- Sensory Bin Treasure Hunt
Materials: A shallow bin or large container, dry filler material (uncooked rice, dried beans, sand, or even shredded paper), and an assortment of small “treasures” to hide (e.g. plastic beads, pom-poms, toy animals, large buttons). Optional tools: a small shovel, spoon, or cup for scooping.
How to Play: Fill the bin with the sensory material and mix in the hidden treasures. Invite your preschooler to dig in! They can use their hands to sift through and find the objects or use the scoop and cups to pour and explore. Turn it into a game by asking them to find all the red pom-poms or counting how many animals they rescued from the “rice pool.” Ensure the items are not so tiny that they pose a choking risk (supervise especially with 3-year-olds).
Skills Developed: A sensory bin provides a rich tactile experience while also exercising fine motor skills. As children push their hands through rice or pick up small hidden objects, they practice finger dexterity and strengthen their grasp. Picking up little treasures among the filler is great pincer grasp practice. If they use scoops or cups, they’re building hand-eye coordination to pour without spilling. This activity also engages bilateral coordination (one hand might hold a cup while the other fills it). Moreover, the varied textures stimulate sensory processing, and the “treasure hunt” aspect can improve focus and perseverance in completing a task.
- Sticker Peel-and-Place Station
Materials: Stickers of any kind (stars, animals, smiley faces, etc.) and a blank paper or coloring sheet to stick them on. For an added challenge, use dot stickers and draw small circles on the paper where the stickers should go, or provide a simple scene to decorate with stickers.
How to Play: Give your child a sheet of stickers and show them how to peel one off and stick it onto the paper. They can decorate freely – make a sky of star stickers, fill a shape with colorful dots, or add stickers onto a drawing. Young children might need help to get an edge of the sticker started, but try to let them do the peeling and pressing as much as possible. This can also be done with foam stickers or labels, which are usually easier for little fingers to grasp.
Skills Developed: Peeling stickers off the backing is fantastic fine motor work – it requires a precise pincer grasp and isolates the movement of one hand’s fingers while the other hand holds the sheet. This builds finger strength and coordination. Placing the sticker on a target spot further practices hand-eye coordination and careful control. Art activities with stickers involve the same kind of precise finger movements needed for tasks like buttoning or writing. Plus, kids get a sense of accomplishment creating a picture, which boosts their confidence. It’s a quiet, focused activity that also helps lengthen attention span.
- Finger Painting or Q-Tip Painting
Materials: Non-toxic finger paints (or homemade paint), paper (large paper or finger-paint paper), smock or old shirt for mess protection. Optional: cotton swabs (Q-tips) and washable paint if doing dot painting.
How to Play: Roll up sleeves and let your preschooler get hands-on with paint. They can use their index finger (or whole hand) to swirl colors on the paper, draw shapes, or make handprints. For a fine-motor twist, offer Q-tips as tiny “paintbrushes” that they can dip in paint and stamp dots or paint details. You might suggest they try making dot art (like a dotted rainbow or caterpillar) using one dot at a time. Playing some music during painting can add to the fun and even encourage them to make certain movements with their fingers.
Skills Developed: Finger painting engages the small muscles in the fingers and hands in a very direct way. As children isolate fingers to swirl lines or press on the paper, they build finger strength and control needed for writing. It also enhances hand-eye coordination as they see the marks their fingers make. Using a single finger or a Q-tip for dot painting refines their pincer grip and precision. This activity doubles as a sensory experience – feeling the cool, squishy paint – which can improve sensory integration. Additionally, creating art with their own fingers boosts creativity and can be a confidence-builder. (Bonus: Finger painting is fun, which means kids will happily exercise those fine motor muscles without even realizing it!)
- Clothespin Clip Game
Materials: Spring-type clothespins (the pinching kind), and something to clip them onto: a thin edge of a cardboard box, a thick paper plate, a clothesline or string hung between two chairs, or even the rim of a plastic bowl. You can also use small doll clothes or paper cut-outs to make it a pretend “laundry hanging” game.
How to Play: Show your child how to press a clothespin to open it (using thumb and index finger) and then clamp it onto the target (edge of a box or hang a “shirt” on a line). Let them practice clipping all the clothespins on and then pulling them off. If using a clothesline setup, they might enjoy hanging socks or pretend clothes. Another idea: draw a face on a clothespin and have them “feed” it paper or felt “food” by clipping onto it. Keep it light and playful.
Skills Developed: Pinching clothespins is excellent for developing the same thumb-finger pinching motion used in pencil grasp and buttoning. It really works the finger muscles and hand strength because clothespins provide resistance. This activity also improves hand-eye coordination as children align and attach the pins. Using clothespins mirrors the motion of scissors (opening and closing), so it builds foundational skills for cutting too. If the child holds the item with one hand and clips with the other, it’s good bilateral coordination practice. Overall, it’s a simple, practical life task that readies little hands for tool use and daily living skills (and kids love the feeling of accomplishment when they see all the pins they attached!).
- Spray Bottle Fun (Spray & Squirt)
Materials: A child-friendly spray bottle filled with clean water (choose a small bottle with an easy-to-press trigger), and a target for spraying. Targets could be: outdoor sidewalk or a chalk drawing on a fence to “erase” with water, plants to water, or ping pong balls set up on cups to knock off with spray. If indoors, you can use a bathtub wall or tile as a target (with water play).
How to Play: Teach your preschooler how to hold the spray bottle (often two hands at first: one to aim, one to press the trigger) and let them practice squirting water. They can water the flowers or aim at chalk letters you’ve drawn outside and try to make them disappear. Another game is placing lightweight items like ping pong balls or bottle caps on a table and seeing if they can spray them until they fall off – a toddler-friendly “water gun” game. Always supervise and make sure they don’t spray toward people’s faces or anything sensitive.
Skills Developed: Squeezing a spray bottle trigger is an effective way to strengthen the muscles of the hand and improve grip endurance. It specifically exercises the fingers (especially the index and middle finger that press the trigger) and the coordination to repeatedly squeeze and release. Young children may use two hands at first, which is fine – they are still working those fine motor skills and learning hand dominance. Aiming the spray at a target builds hand-eye coordination and focus. This activity also provides proprioceptive feedback (they feel the resistance of the trigger and see the effect of their action), which can help with motor planning. Overall, using a spray bottle is a fun, play-based way to build hand strength needed for skills like using scissors or writing, and kids love any activity that involves water!
- Sponge Squeeze Water Transfer
Materials: Two bowls or buckets (one filled with water, one empty), and a couple of sponges (regular kitchen sponges or larger car-wash sponges). A towel or tray underneath can help contain spills.
How to Play: Place the bowls side by side or on the floor. Have your child soak a sponge in the bowl of water – let it get nice and full – then lift it out and squeeze the water into the empty bowl. They can repeat this over and over, “transporting” water from one bowl to the other using the sponge. Challenge them to see if they can move all the water, or time how fast they can do it, or just let them enjoy the sensory aspect of the wet sponge. You can also add some food coloring to the water for visual fun, or use this activity in the bath.
Skills Developed: Squeezing a sponge with little hands gives a serious workout to their hand and finger muscles. The action of gripping and wringing out a sponge builds overall hand strength and endurance. It targets the whole hand (extrinsic) muscles and also the smaller intrinsic muscles as they adjust their grip. This is great for developing the power needed for tasks like opening jars or using a stapler in the future. Transferring water also requires coordination – they have to position the sponge over the bowl before releasing, which practices hand control and aim. There’s bilateral coordination here too: one hand might stabilize the bowl while the other squeezes, or they may use both hands together to wring out a big sponge. As a bonus, it’s a wonderful sensory play experience (water play is calming and engaging) that can keep grumpy kiddos entertained while secretly strengthening their fine motor skills.
- Puzzle Play
Materials: Age-appropriate puzzles. For preschoolers, this could be chunky wooden puzzles with knobs, simple 5-10 piece jigsaws, shape sorters, or foam inset puzzles. Even building a simple 3D puzzle or shape stacker can count.
How to Play: Invite your child to put together a puzzle. Spread out the pieces and help them if needed by showing how pieces match. For beginners, start with single-shape puzzles or 2-3 piece puzzles, then work up to more pieces as their skills grow. Encourage them to rotate pieces to fit or use the pincer grasp on small knobs. If using a shape sorter, have them pick up shapes and find the correct slot. Make it fun by puzzling together and giving hints like “I see a piece with an eyeball, does it match the cat picture?”
Skills Developed: Puzzles are a fantastic tool for developing fine motor skills. Picking up and manipulating the small pieces strengthens finger muscles and improves dexterity. Children use their pincer grasp to grab puzzle knobs or edges, and often need to use both hands – one to hold the puzzle board and one to place the piece – which enhances bilateral coordination. Fitting a piece into place requires precise hand-eye coordination and sometimes an adjustment of grasp as they turn the piece to the correct orientation. The act of pressing a piece down into a slot also gives feedback on finger strength. Beyond fine motor, puzzles boost visual perception and problem-solving, but from a motor perspective, they help kids learn how to coordinate their hands and eyes to achieve a goal. Even something as simple as a peg puzzle of shapes will build those little hand skills (and confidence as the picture comes together).
- Building Blocks and LEGOs
Materials: Any kind of building blocks – wooden blocks, foam blocks, interlocking bricks like LEGO or DUPLO (larger LEGO for little hands), Mega Bloks, or even stacking cups. Choose block size appropriate for the child’s age (standard LEGO bricks are usually best for 4+; DUPLO for 3+; always watch out for choking-size pieces with under-3s).
How to Play: Let your child build freely with the blocks. They might stack towers, create a house, or just connect and disconnect pieces. You can join in to build a simple structure and then have them mimic or add on. Another idea is to make a pattern (like red-blue-red-blue blocks in a tower) and have them try it. There’s also fun in knocking down block towers – just make sure fingers are out of the way when they do! For LEGO-type bricks, show them how to press two bricks together and pull them apart. Building on a raised base (like a DUPLO base board) can add stability for them.
Skills Developed: Block play improves fine motor skills along with a host of other abilities. Grasping and positioning blocks uses the small muscles of the hands and fingers, refining a child’s ability to manipulate objects. When kids connect LEGO bricks, they exercise finger strength and precise pressure control (aligning the studs and pushing pieces together takes a good press with the fingertips). Picking up and stacking blocks involves hand-eye coordination to balance pieces so the tower doesn’t topple. They also practice bilateral coordination: one hand might hold a structure steady while the other adds a block. Building with blocks or LEGOs is noted to improve fine motor control and hand-eye coordination in young children. As they get more proficient, they can tackle more complex constructions, further challenging their dexterity. Plus, playing with blocks adds in creativity, spatial awareness, and early engineering thinking – all while those little hands get stronger and more skillful.
- Pipette or Eye Dropper Color Mixing
Materials: Plastic pipettes or eye droppers (the kind you squeeze at the top), a few small cups or bowls, water and food coloring (or liquid watercolors). An ice cube tray or muffin tin can work well to drop colors into. You’ll also want a tray or plastic sheet under the activity to catch drips, and paper towels on hand.
How to Play: Fill a couple of cups with water and tint each with a different food coloring (for example, one red, one blue, one yellow). Give your child an empty ice cube tray or a lined-up set of clear cups. Show them how to squeeze the bulb of the dropper, put the tip in colored water, then release to suck it up, and finally squeeze again to release drops into another container. They can experiment by transferring colored water into the ice cube tray sections, mixing colors to discover new ones (red + blue to make purple, etc.). This can be a free exploration or you can prompt them: “Can you fill each section with drops? Let’s make this one green,” and so on.
Skills Developed: Using an eye dropper is classic fine motor practice. The motion of squeezing and releasing the dropper’s bulb builds hand and finger strength and teaches controlled finger movements. It’s essentially a pincer grasp exercise too, since kids usually use thumb and first two fingers to operate the dropper. Releasing one drop at a time requires precision and patience, honing their control. This activity also strengthens hand-eye coordination as children aim the dropper into small containers without spilling. If they try to create specific colors, it adds a cognitive element (science and prediction), but physically, it’s all about controlled squeezing and fine finger coordination. Many occupational therapists use eye dropper games to develop pre-writing skills because it’s great for isolating finger movements. Plus, preschoolers find mixing colors magical, so they stay engaged while their little muscles get a workout.
- Paper Tearing and Gluing (Mosaic Art)
Materials: Colored construction paper or old magazines/newspaper, a large sheet of paper as a base, child-safe glue (glue stick or a little dish of white glue with a brush).
How to Play: Have your child tear the colored paper or magazine pages into small pieces. They can tear strips and then smaller bits – demonstrate using their thumb and fingers of each hand to pull paper apart. Once they have a pile of torn pieces, help them smear glue on the larger base paper and stick the pieces down to make a collage. It could be abstract, or you draw a simple outline of a shape (like a butterfly or a tree) and they fill it in with the torn paper mosaic-style. They might also crumple some pieces into balls and glue them for texture. The process of tearing and then gluing can be separated if needed (tear first, then glue after).
Skills Developed: Tearing paper requires a forceful but controlled use of the fingers. It strengthens the pincer grasp and coordination between both hands (one hand stabilizes, the other tears). This bilateral exercise builds hand strength and helps children learn to use hands together in a coordinated way. The precise act of placing the torn pieces onto a glued area exercises fine finger control and hand-eye coordination. Art activities like tearing paper for collages involve precise hand control and also build creative confidence. You might notice your child uses their thumb, index, and middle fingers to pick up each scrap – the same combination used for holding a pencil. Thus, ripping and pasting not only results in a fun artwork but also translates to stronger, more nimble fingers for future writing and daily tasks.
- Tape Peeling Rescue Mission
Materials: Painter’s tape or washi tape (something that isn’t too sticky and won’t damage surfaces), and small toys or pictures to “rescue” (for example, plastic figurines, toy cars, or even just make X shapes with tape). You can do this on a table, floor, or even vertically on a wall or window (for an added gross-motor aspect).
How to Play: Use tape to trap the toys: e.g., tape a toy animal down to a table with a few strips crisscrossed over it, or tape over the doors of a toy car so the child has to peel it off to “open” it. If no toys, simply stick strips of tape all over an area and challenge your child to peel them all off (they become the “tape cleaner” or “rescuer”). Make sure some tape ends are accessible – you can fold a tiny bit of the end to make a non-sticky tab if needed. Then let your preschooler get to work picking at and peeling up the tape. They’ll enjoy the sticky sensation and the mission of freeing their favorite toys.
Skills Developed: Peeling tape is a surprisingly powerful fine motor exercise. It forces children to use a precise pincer grasp to lift the edge of the tape and then a combination of pinch and pull to peel it back. This action strengthens little fingers and hands tremendously – they are working against the resistance of the tape’s stickiness, which builds muscle. It also improves bilateral coordination: one hand holds the object or holds one end of the tape, while the other hand pulls the tape free. Kids have to exercise patience and careful control, especially if the tape rips and they have to start a new edge. It’s great for developing perseverance and problem-solving (“Which piece should I peel first?”). In addition, pulling tape provides tactile and proprioceptive feedback that can be very satisfying for children. This activity mimics motions needed for tasks like removing stickers or unwrapping objects – very practical life skills. Plus, there is a clear goal (rescue the toy or remove all tape), which adds to the sense of achievement.
- Pouring and Scooping Practice
Materials: A small pitcher or watering can, cups or bowls, and either water (for outdoor or tabletop water play) or dry materials like rice, beans, or sand for indoor play. Also a large tray or towel to catch spills. You can also include a large spoon or funnel to broaden the experience.
How to Play: Fill the pitcher with water (or dry material) and place empty cups out. Encourage your child to pour from the pitcher into the cups. Start with the target cup being large and close by, then increase challenge by using smaller cups or pouring to multiple containers. If using spoons, have them scoop from one bowl and transfer to another. They can pretend to be a chef pouring ingredients or a server pouring drinks. Another variation: mark a “fill line” on a cup with tape and have them practice pouring to the line (as done in Montessori style activities). Keep towels handy and treat spills as no big deal – part of the learning.
Skills Developed: Grasping a handle and pouring helps children develop fine motor control and coordination. Pouring is actually a complex task: it requires a steady hand, controlled wrist movement, and careful timing to stop before overflow. By practicing pouring, kids improve hand-eye coordination as they aim the stream of water or grains into the target cup. It also strengthens the muscles in the hand that manage grip and wrist rotation. They learn to modulate force (tilting slowly vs. quickly) which is critical for tasks like controlling a pencil’s pressure. Scooping with a spoon similarly builds wrist and finger control, as well as grip strength. These practical life skills boost independence – after mastering a pouring activity, a child often delights in pouring their own drink or helping in the kitchen. It’s a clear example of how a simple task isolates a single skill that will later be used in more complex ways, and it quietly develops concentration and patience too.
- Twist, Turn, and Screw (Lids and Nuts & Bolts)
Materials: A collection of jars and bottles with screw-on lids (plastic ones are safest for preschoolers – e.g. empty water bottles, milk jug caps, jam jar with smooth edges) and/or a set of large plastic nuts and bolts (toy or hardware store versions, at least 1-2 inches diameter for safety). You could also use a child-friendly toy screwdriver with a block of Styrofoam and some short screws if available.
How to Play: Create a “twisting station.” Set out the containers and show your child how to twist the lids on and off. Encourage them to open all the jars, then screw the lids back on each one (they can hide a small toy or pom-pom inside as a surprise to find after unscrewing!). If using nuts and bolts, demonstrate how to match a nut to the correct bolt and twist it on until it’s tight, then remove it. A play scenario could be that they are a mechanic fixing things with screws and bolts. Ensure they know not to put the small pieces in their mouth and supervise closely.
Skills Developed: Twisting motions are a tricky but important fine motor skill – think about opening a milk jug or turning a doorknob. By practicing with lids and bolts, children strengthen their fingers and wrists. This activity improves bilateral coordination because one hand typically holds the jar or bolt while the other hand twists the lid or nut. It enhances hand stability and dexterity, and the rotation movement builds muscle memory for tasks like using a screwdriver or even writing (which has a rotational component in forming letters). Kids also gain a sense of real-world accomplishment (“I can open it myself!”), boosting independence. From a development standpoint, twisting and screwing activities help refine the separation of the two sides of the hand – the power side (last two fingers stabilizing) and the skill side (thumb, index, middle doing the twisting action). So, this simple station goes a long way in preparing little hands for everyday life skills and tool use.
- Finger Play Songs and Puppet Play
Materials: No special materials required for finger play songs – just your hands! If available, you can add finger puppets or small props (like five little frog cut-outs for “Five Speckled Frogs,” etc.), but they’re optional.
How to Play: Engage your preschooler in classic finger play rhymes and songs. Some favorites: “Itsy Bitsy Spider” (make the climbing spider with alternating thumb-index pinches), “Five Little Monkeys” (hold up fingers and have them “jump” and “fall off” the bed), “Where is Thumbkin” (hide and show each finger), “Open Shut Them” (opening and closing fists), and “Pat-a-Cake” (clapping and rolling). Sing or say the rhyme and demonstrate the finger/hand movements, encouraging your child to do them with you. Finger puppet play is another great option – put little puppets on their fingers (or even simple DIY ones from paper) and encourage imaginative play or song routines (like finger puppets putting on a show).
Skills Developed: Finger play songs are not only wonderful for language and rhythm, but they also significantly enhance fine motor development. These activities encourage finger isolation (moving one finger at a time, as when the itsy bitsy spider climbs or when each little monkey jumps off the bed) and overall finger dexterity. They also often involve bilateral coordination – for example, doing motion with both hands together (as in open-and-shut them, or climbing fingers that require both hands to work in sync). The hand movements in finger plays strengthen hand and finger muscles and improve coordination, which in turn supports skills like writing and tool use. In fact, occupational therapists note that finger rhymes can help with motor planning and sequencing, as children have to remember the sequence of movements and execute them at the right time. Using finger puppets adds the element of pincer grasp (to manipulate the puppet) and can improve hand control as children animate their puppet. All in all, these musical games are a fun, screen-free way to build fine motor skills – kids are so busy singing and pretending, they don’t even realize they’re exercising their fingers!
- Spaghetti and Cereal Tower
Materials: Uncooked spaghetti strands, playdough or a lump of clay (to stand the spaghetti upright), and O-shaped cereal (like Cheerios) or large pasta rings. Alternatively, use drinking straws in the playdough and Life Savers candy or washers as the rings for a non-food option.
How to Play: Press a few pieces of dry spaghetti vertically into a thick base of playdough placed on a table (so they stand upright like poles). Give your child a pile of the O-shaped cereal. Their task is to carefully thread the cereal pieces onto the spaghetti, stacking them as high as they can go. It becomes a little “tower of Cheerios.” The challenge is to do it gently so the brittle spaghetti doesn’t snap. See how many cereal loops they can stack on one strand, or compare towers on multiple strands. They can then take them off and eat them if it’s clean and you allow, making it a snack-time game too.
Skills Developed: Threading Cheerios onto a thin piece of spaghetti is a deceptively powerful fine motor activity. It demands a very precise pincer grasp and careful hand-eye coordination to align each tiny circle with the skinny spaghetti. Children learn to adjust their force and be gentle – if they push too hard or at the wrong angle, the spaghetti will bend or break. This teaches excellent control of pressure and refined motor planning. Every time they successfully get a cereal onto the noodle, they’re reinforcing finger dexterity and steadiness. This activity uses the same small muscles needed for writing and buttoning, in a fun, game-like format. It also helps lengthen attention span and concentration, as kids often get quite absorbed in trying to top their previous record of how many pieces they can stack. In essence, this simple household challenge is “a powerful way to help your child develop fine motor skills” because it engages the small hand muscles crucial for later tasks – all under the guise of play. Plus, who doesn’t love a snack that doubles as skill-building?
Final Thoughts
All of these fine motor activities turn skill practice into play. By regularly engaging your preschooler in a variety of preschool fine motor activities—from messy art projects to practical life tasks—you’ll be helping their little hands get ready for bigger challenges ahead. The key is to keep it fun, low-pressure, and encouraging. Celebrate their efforts with praise like, “You squeezed that sponge so hard—look how much water you moved!” or “Wow, you put all 10 beads on the string!”
Through consistent and playful fine motor activities, children build stronger fingers, sharper hand-eye coordination, and greater control—all while gaining confidence, patience, and independence. Like all developmental skills, fine motor growth takes time and practice. But with every snip, pinch, scoop, and scribble, your child is mastering essential life tasks. Some common fine motor skills examples include holding a pencil, buttoning a shirt, cutting with scissors, or zipping a jacket. These everyday moments are building blocks for school success and self-care—proving that play really does build lifelong skills.
About illumine
illumine is a childcare management software designed to support a childcare business’ ongoing growth. Key features include:
- Automated reminders for training and certification deadlines for educators
- Real-time child progress tracking
- Seamless parent communication tools
- Comprehensive reporting for compliance and child development
Simplifying childcare management doesn’t have to be difficult —BOOK A DEMO to know more about us .
Book a demo banner
FAQS
1. What are fine motor skills, and why do they matter for preschoolers?
Fine motor skills are small muscle movements—especially in the hands and fingers—that children use for tasks like writing, buttoning, or using scissors. Developing these skills early helps toddlers and preschoolers build independence, confidence, and school readiness. That’s why regular fine motor activities for preschoolers are so valuable.
2. Can you give some fine motor skills examples for toddlers?
Sure! Common fine motor skills examples include holding a crayon, threading beads, cutting with child-safe scissors, or peeling stickers. These everyday tasks help build coordination, finger strength, and focus—key abilities that fine motor activities for toddlers aim to develop.
3. What are some easy fine motor activities I can try at home?
You can do many fine motor skills activities using household items. Try things like playdough pinching, pouring water between cups, sticker peeling, or building with blocks. These simple motor skills activities are great for strengthening little hands while keeping playtime fun and engaging.
4. How do fine motor activities help with school readiness?
Through repeated practice, fine motor activities help children control their hand movements, improve hand-eye coordination, and prepare for tasks like handwriting, cutting, and using classroom tools. For ages 3–4, these activities support early learning in a playful, stress-free way.
5. How often should I do fine motor activities with my child?
Daily is ideal—even 10 to 15 minutes can make a big difference. Try rotating different fine motor activities for 3–4 year olds to work various muscles and keep things fresh. Regular practice builds strength and confidence over time.
6. Are these preschool fine motor activities suitable for all learning styles?
Yes! Whether your child is sensory-seeking, creative, or hands-on, there’s a fine motor activity that will suit them. From finger painting to puzzles to using tweezers, these preschool fine motor activities can be adapted for all kinds of learners and abilities.


